How to Clip Your Pet’s Nails
- 14 November 2024
- BuyAPet Editorial Team
- All Cats, All Dogs, Cats and Dogs
How to Clip Your Pet’s Nails
Trim nails safely with the right tools, gentle handling and a step‑by‑step plan.
Overview
Keeping your pet’s nails in check is super important for their health and happiness. Long nails can cause pain, discomfort, and even lead to injuries. But don’t worry! Clipping your furry friend’s nails can be a breeze with the right approach. Let’s break it down step-by-step.
Why Nail Clipping Matters
Just like us, pets need regular nail care. When nails grow too long, they can snag on things or break, causing pain. Imagine trying to walk with shoes that are a size too small—yikes! Regular nail trimming helps your pet walk comfortably and can prevent future health issues.
Gather Your Supplies
Before you start, it’s time to get your tools ready. You’ll need
Nail clippers: Choose a type that fits your pet’s size. For small pets, a scissor-type clipper works well. For bigger pets, a guillotine-style clipper might be the way to go.
Nail file: This can smooth out any sharp edges after clipping.
Styptic powder: In case you accidentally cut too far, this helps stop the bleeding.
Having everything on hand means you won't have to scramble during the process.
Getting Your Pet Cozy
Creating a calm environment makes a huge difference. Find a quiet place where your pet feels safe. Maybe it’s their favourite spot on the couch or a comfy bed. If your pet gets nervous, consider having a treat ready. This can help them associate nail clipping with something positive.
Step-by-Step Clipping Guide
1. Get Comfortable
First, find a relaxed position. You can sit on the floor or use a table, depending on what’s best for you and your pet. Make sure you're in a spot where you can both feel comfy and secure.
2. Examine the Nails
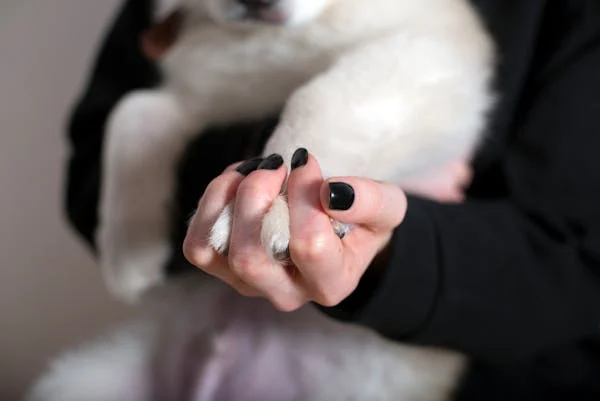
Take a moment to look at your pet’s nails. You’ll notice a part called the “quick,” which is the pink area in lighter nails. Avoid the quick to prevent hurting your pet. If your pet has dark nails, trim a little at a time until you see the quick.
3. Start Snipping
Hold your pet’s paw gently but securely. Begin with just one nail. It’s like taking a tiny slice off the edge of a cupcake—just a little is all you need! Clip a small amount off the tip of the nail. If you're unsure, it’s better to clip less than more.
4. Check the Edges
After clipping, use your nail file to smooth any rough edges. This keeps your pet’s nails neat and avoids any snags.
5. Take Breaks
If your pet starts to get fidgety, take a break. Don’t rush the process. It’s better to do a few nails at a time than to make it a stressful experience.
6. Reward Time!
Once you’ve finished, give your pet a treat and lots of praise. This positive reinforcement will help them feel good about future nail trims.
How Often Should You Clip?
The frequency of nail clipping depends on your pet's activity level. Generally, a trim every 3-4 weeks is good. If your pet walks on hard surfaces often, their nails might wear down naturally, so check more regularly.
Troubleshooting: Handling Fear and Resistance
Some pets might not take kindly to nail clippings. If your furry friend is nervous, try to get them used to the clippers by showing them the tool without clipping. Let them sniff it, or touch it gently to remove some of the mystery. Patience is key!
Conclusion
Clipping your pet’s nails doesn’t have to be a scary task. With the right tools and approach, you can make it a simple part of their grooming routine. Remember, regular nail trimming helps keep your pet happy and healthy. So, grab those clippers, and let’s get started!
FAQs
How often should I clip? +
Typically every 3–4 weeks, but it depends on surfaces walked and growth rate.
What if I hit the quick? +
Use styptic powder to stop bleeding, stay calm and trim smaller amounts next time.
Clippers or grinder? +
Both work. Grinders can smooth edges and give more control for dark nails.
If nails are very long or your pet panics, book a vet or groomer for a reset and guidance.